Ferre's Playground
| Ferre's Playground | |
|---|---|
| Requirements | |
|
Base Level: |
1 (lv 80+ as a party recommended) |
|
Job Level: |
1 |
|
Job Class: |
Any Class |
|
Party: |
No (Need to be in a party but can be a party of 1) |
|
Quest Prerequisites: |
None |
|
Other Requirements: |
None |
| Rewards | |
|
Item(s): |
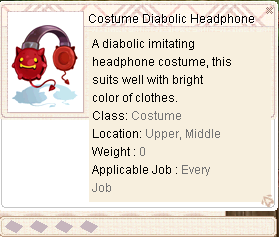
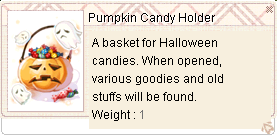
Costume Diabolic Headphones 2 Pumpkin Candy Holder Additional reward may vary. See quest details. |
Contents
Basic Info
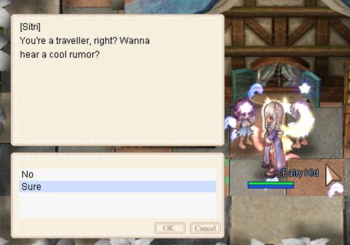
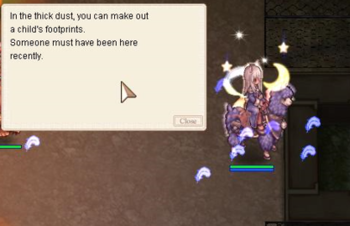
The starting point of this quest is in Tessera (134, 180). If you have 25 Faeheim Reputation Points, then you'll overhear 2 Fae children talking about fairies moving to the old, abandoned Hunter's Guild in Payon.
The quest will eventually lead you to have access to Ferre's Playground instance by the same name as the quest. You do NOT need to complete the entire instance to finish the quest. You need to defeat up to Room 4 out of 13 to rescue the Bard. Talk to him and he offers to lead you back to Payon to complete the quest. At this point, you no longer need to proceed further into the Instance for the quest. Be warned that Room 5 and beyond are substantially harder than the first 4 rooms, since they are not needed for quest completion. Rooms 5 to 13 are meant for high-end instance dungeons for their difficulty.
Whenever you leave the dungeon, if you have defeated Room 4 or above, be sure to go back to the entrance of the Instance and talk to one of the Ferre's there. Ferre will give you additional rewards, based on how far you have entered the instance. This part of the reward is repeatable, once per opening of the instance.
Quest Procedure
1. Walk to the Fairy Children to trigger the dialogue.
The following Steps 2 - 5 are optional, but included for better flow. You can skip to step 6 for faster quest progress.
| Optional Steps |
|---|
| 2. (Optional) Go to Payon (186,233) and enter the building, then enter the first room on the right. |
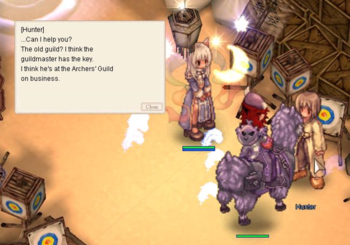
| 3. (Optional) Talk to the NPC inside, they will tell you to find the Hunter Guildmaster. |
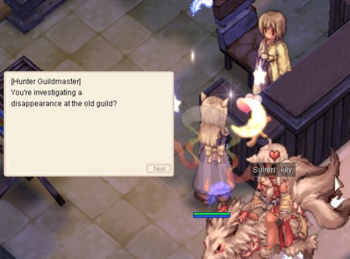
| 4. (Optional) Go to the Archer's guild at Payon Archer Village (142,162) and enter the room on the right to find the guildmaster. |
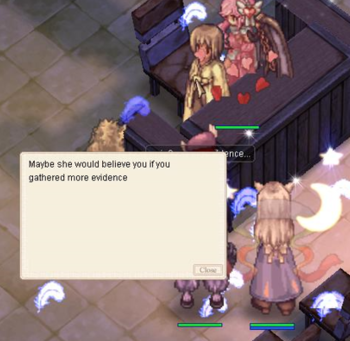
| 5. (Optional) The Guildmaster will ask you for "evidence" |
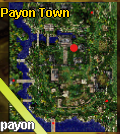
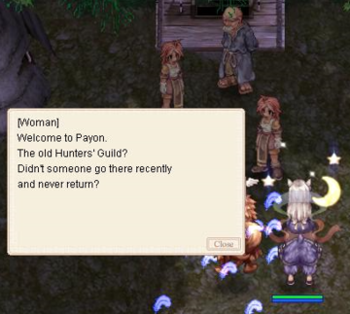
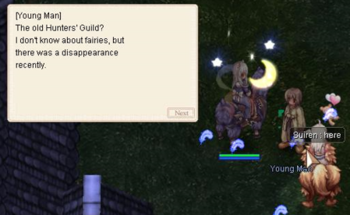
6. Go to Payon Town and gather the "evidence" from the following NPCs:
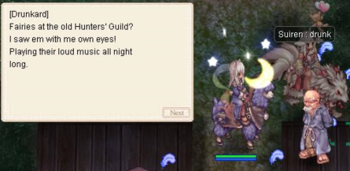
- Drunkard at Payon (210,110)
- Woman at Payon (249,156)
- Young man at Payon (134,211)
After talking to all 3 of them you will get a dialogue box saying you have gathered enough evidence
7. Return to the Guildmaster in Archer's Guild to get the Key
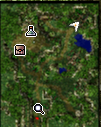
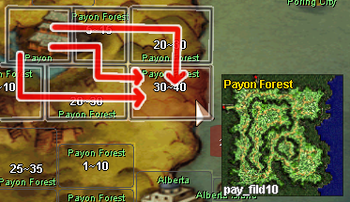
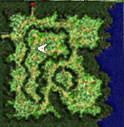
8. Go to Pay_Fild10.
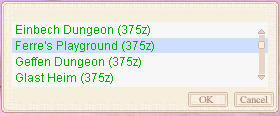
If you have it unlocked (some people have a bug that unlocks it immediately) you can use warper service (Dungeons --> Ferre's Playground)
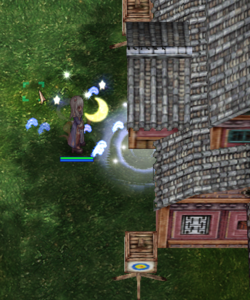
There will be a signpost at (148,252). Click on it to enter the Old Hunter's Guild
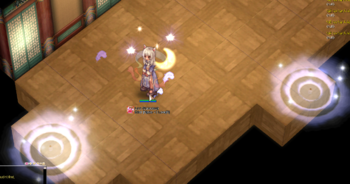
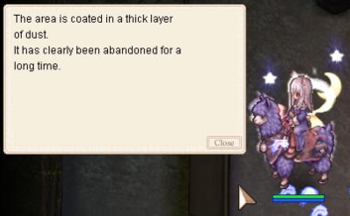
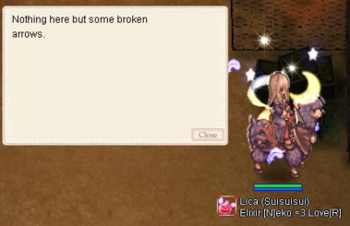
9. Once inside, walk straight until you see a desk. You need to trigger dialogue box on 3 spots
- Go to the desk on the left
- Approach the boxes in the Center
- Go to the desk on the right
Once done with all 3, walk back towards the exit and talk to the Ferre there
Pick
- "I'm looking for a missing Bard"
and then
- "Yes"
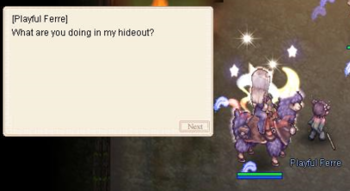
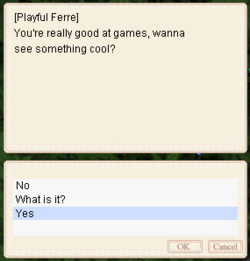
to play a game of Hide-and-seek with the Ferre.
10. The Ferre Will be Hiding in a random spot in Pay_Fild10. You need to find her 3 times to proceed to the next step.
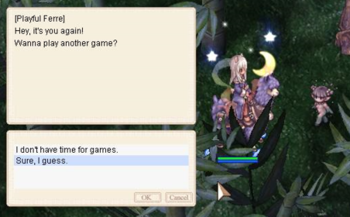
11. After finding her 3 times, go back to the Old Hunter's Guild Signpost and talk to the Ferre. Tell her "Sure, I guess" to proceed to the next step
12. Go to Pay_Fild10 (273,324) and talk to the Piano.
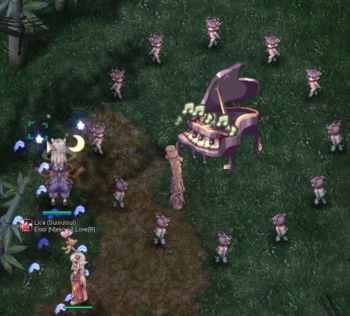
The Game is as follows:
- The Ferres surrounding the pianos all represent a single musical note/key
- The piano will tell you a musical chord
- You pick which musical note/key is involved in the chord, and tell the respective Ferre to play the note
- After you ask all the required Ferres to play, talk to the piano to finalize your answer
- You have to do this 4 times, and will need to redo from the start if you fail a chord
Nerdy Music Stuff
| Nerdy Music Stuff | ||||||||||||
|---|---|---|---|---|---|---|---|---|---|---|---|---|
Musical Notes include seven basic note names: A, B, C, D, E, F, and G. After G, the sequence repeats.
Chords are often derived from scales. The notes of a chord are usually taken from a specific scale. For instance, the C major scale provides the notes for the C major chord (C, E, G), and the A minor chord (A, C, E) comes from the A minor scale. In summary, scales are a sequence of notes, and chords are groups of notes played together to create harmony. Aside from Scales and Chords, we also have Sharp (♯) and Flat (♭)
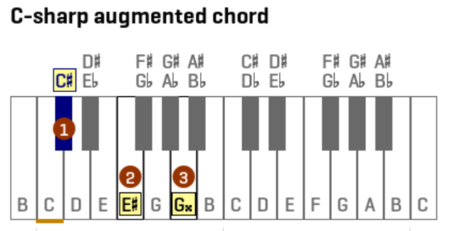
Using a sharp or a flat twice raises or lowers the pitch by a step respectively (Symbol x for double sharp and 𝄫 for double flat) An example for this is the C-sharp Augmented Chord,
In This Example,
Therefore, the in-game answer for C# Augmented Chord is C♯, F, A ~End of Nerd Music Stuff~ |
Chord Information
The note in () is the real chord, play the chords that are not in () In game : ♯ = # and ♭ = b
C chords
| C chord | Notes / Keys in-game |
|---|---|
| C Major | C E G |
| C Minor | C E♭ G |
| C Diminished | C E♭ Gb |
| C Augmented | C E G♯ |
| C Major7 | C E G B |
| C Dominant7 | C E G B♭ |
| C Minor7 | C Eb G B♭ |
| C Diminished7 | C E♭ G♭ A(B♭♭) |
C♯ chords
| C♯ chord | Notes / Keys in-game |
|---|---|
| C♯ Major | C♯ F(E♯) G♯ |
| C♯ Minor | C♯ E G♯ |
| C♯ Diminished | C♯ E G |
| C♯ Augmented | C♯ F(E♯) A(G♯♯) |
| C♯ Major7 | C♯ F(E♯) G♯ C(B♯) |
| C♯ Dominant7 | C♯ E♯ G♯ B |
| C♯ Minor7 | C♯ E G♯ B |
| C♯ Diminished7 | C♯ E G B♭ |
D chords
| D chord | Notes / Keys in-game |
|---|---|
| D Major | D F♯ A |
| D Minor | D F A |
| D Diminished | D F A♭ |
| D Augmented | D F♯ A♯ |
| D Major7 | D F♯ A C♯ |
| D Dominant7 | D F♯ A C |
| D Minor7 | D F A C |
| D Diminished7 | D F A♭ B(C♭) |
E♭ chords
| E♭ chord | Notes / Keys in-game |
|---|---|
| E♭ Major | E♭ G B♭ |
| E♭ Minor | E♭ Gb B♭ |
| E♭ Diminished | E♭ G♭ A(B♭♭) |
| E♭ Augmented | E♭ G B |
| E♭ Major7 | E♭ G B♭ D |
| E♭ Dominant7 | E♭ G B♭ D♭ |
| E♭ Minor7 | E♭ G♭ G♭ D♭ |
| E♭ Diminished7 | E♭ G♭ A(B♭♭) C(♭♭) |
E chords
| E chord | Notes / Keys in-game |
|---|---|
| E Major | E G♯ B |
| E Minor | E G B |
| E Diminished | E G Bb |
| E Augmented | E G♯ C(B♯) |
| E Major7 | E G♯ B D♯ |
| E Dominant7 | E G# B D |
| E Minor7 | E G B D |
| E Diminished7 | E G B♭ D♭ |
F chords
| F chord | Notes / Keys in-game |
|---|---|
| F Major | F A C |
| F Minor | F A♭ C |
| F Diminished | F A♭ B(C♭) |
| F Augmented | F A C♯ |
| F Major7 | F A C E |
| F Dominant7 | F A C E♭ |
| F Minor7 | F Ab C E♭ |
| F Diminished7 | F A♭ B(C♭) D(E♭♭) |
F♯ chords
| F♯ chord | Notes / Keys in-game |
|---|---|
| F♯ Major | F♯ A♯ C♯ |
| F♯ Minor | F♯ A C♯ |
| F♯ Diminished | F♯ A C |
| F♯ Augmented | F♯ A♯ D(C♯♯) |
| F♯ Major7 | F♯ A♯ C♯ F(E♯) |
| F♯ Dominant7 | F♯ A♯ C♯ E |
| F♯ Minor7 | F♯ A C♯ E |
| F# Diminished7 | F♯ A C E♭ |
G chords
| G chord | Notes / Keys in-game |
|---|---|
| G Major | G B D |
| G Minor | G B♭ D |
| G Diminished | G B♭ D♭ |
| G Augmented | G B D♯ |
| G Major7 | G B D F♯ |
| G Dominant7 | G B D F |
| G Minor7 | G B♭ D F |
| G Diminished7 | G B♭ D♭ E(F♭) |
A♭ chords
| A♭ chord | Notes / Keys in-game |
|---|---|
| A♭ Major | A♭ C E♭ |
| A♭ Minor | A♭ B(C♭) E♭ |
| A♭ Diminished | A♭ B(C♭♭) D(E♭♭) |
| A♭ Augmented | A♭ C E |
| A♭ Major7 | A♭ C E♭ G |
| A♭ Dominant7 | A♭ C E♭ G♭ |
| A♭ Minor7 | A♭ B(C♭) E♭ G♭ |
| A♭ Diminished7 | A♭ B(C♭) D(E♭♭) F(G♭♭) |
A chords
| A chord | Notes / Keys in-game |
|---|---|
| A Major | A C♯ E |
| A Minor | A C E |
| A Diminished | A C E♭ |
| A Augmented | A C♯ F(E♯) |
| A Major7 | A C♯ E G♯ |
| A Dominant7 | A C♯ E G |
| A Minor7 | A C E G |
| A Diminished7 | A C E♭ G♭ |
B♭ chords
| Notes / Keys in-game | |
|---|---|
| B♭ chord | Notes / Keys in-game |
| B♭ Major | B♭ D F |
| B♭ Minor | B♭ D♭ F |
| B♭ Diminished | B♭ D♭ E(F♭) |
| B♭ Augmented | B♭ D F♯ |
| B♭ Major7 | B♭ D F A |
| B♭ Dominant7 | B♭ D F A♭ |
| Bb Minor7 | B♭ D♭ F A♭ |
| B♭ Diminished7 | B♭ Db E(F♭) G(A♭♭) |
B chords
| B chord | Notes / Keys in-game |
|---|---|
| B Major | B D♯ F♯ |
| B Minor | B D F♯ |
| B Diminished | B D F |
| B Augmented | B D♯ G(F♯♯) |
| B Major7 | B D♯ F♯ A♯ |
| B Dominant7 | B D♯ F♯ A |
| B Minor7 | B D F♯ A |
| B Diminished7 | B D F A♭ |
After successfully completing 4 sets of chords, the Piano tells you to find the Ferre again.
13. She is at Pay_Fild10 (193,39). Use the Ferre's Playground Warp to quickly get to her. Rotating the screen allows you to see her easily.
Select "Yes" to open the instance. Make sure you are ready since you will be immediately warped inside!
At this point you have unlocked the instance and can run it as many times as you'd like.
14. In Room 4 of the instance, talk to the bard to send him back to town. He is located in the upper left corner of the room.
You have the option to keep going or go back with him, either choice will make him spawn in town.
15. Talk to the bard at Payon (202,120) to get:
- Costume Diabolic Headphones
16. Warp to Ferre's Playground (Pay_Fild10), and talk to the Ferre at (181,40) to get:
- 2 Pumpkin Candy Holders
There may be additional rewards but it will vary each time. See the reward section down below.
Instance Info
Note: the first 4 rooms can be completed by well-equipped non-trans lv 80 characters, or a duo of only moderately geared trans characters.
Room 1
Look at all these plants! I wonder if there is a special one among them all... perhaps a Playful one?
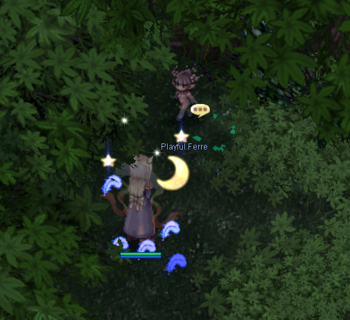
There are plants in the room along with 1 of each Ferre in the room on a long spawn timer. Talk to each plant and kill the Ferre that spawns from it. If it's the Playful Ferre, the warp to the next room will open. This room is a check to see if you are capable of handling the Ferres. If you struggle with this room, it's advised that you back off and gear up to handle the monsters.
Room 2
What's this? a message from the Ferre?
"Well done finding me before! Let's see if you can find me again! Tag! You're it!"
I wonder if I can just AoE them all, what's the worst that could happen?
There are many Ferres in the room. Find the Playful Ferre amongst all the Ferres and kill it to open the warp to the next room.
Room 3
Another message from the Ferre...
"You found me again! That was lots of fun! Let's go again, this time I'll be it!"
I think I can see the goal on the other side of the room, but man they run fast!
The Ferres move at blazing speed, and if they reach you, then you'll be sent back to room 1. They are in the Invincible status where they only take one damage, but they are still affected by spells. You have a couple of options to bypass the Ferre. Crowd control spells and skills all work, such as ankle snare, web or storm gust. Ice Wall can also block them off if you are throughout to make sure there's no gaps. They also can't detect invisibility, so cloaking along the wall works as well via Frilldora card.
Room 4
Looks like the Ferre wants to play more... she even brought a Piano with her!
...Wait is that the bard who went missing?
Looks like he can find his own way back, or I can go with him. I am curious about what games the Ferre has though...
This is a battle room. Defeat the waves of Ferre with 1 Jitterbug as the last enemy. There are a few seconds in-between each wave to give you some breathing room to buff up or resurrect any fallen party members. At the end, a bard will appear at the top left-hand corner of the room (if you don't see him, go to the other end of the room and return to the upper corner. He should appear.) If you talk to the Bard, he'll warp you back to Payon and give you the quest reward, Costume Diabolic Headphones. You can use the warper to go back to the instance if you wish, or go find him on your own in Payon after you've finished exploring the instance.)
Room 5
Note: From this point onward, the difficulty of the instance is designed for a team of trans characters.
There are invisible walls in the room, and certain spots in the maze of invisible walls trigger Ferres the spawn and ambush the party. It's advised to send a tanky character to lead the way and trip up all the traps. The portal is blocked off by invisible walls though. Talk to the mushroom in the top right once, then head towards the mushroom on the top left. Each time, it'll say "something mysterious happened." After you interact with both mushroom, you can finally head to the portal.
Room 6
This is a repeat of Room 1 where you talk to the plants to open up the path and kill the Playful Ferre if it spawns. More Ferres spawn here compare to Room 1 though so be careful.
Room 7
This is the Monty Hall problem. Ferre is hiding inside one of the chest. Whenever you pick one, the Ferre host will reveal another chest with a Goat in it. Following the theorem, you always want to switch your choice. If it's the right chest, then playful ferre is there. Kill it and you will go to the next room. If it's the wrong one, then you have 90% chance where a lot of Ferres spawn to ambush you. There is a 10% chance that it spawns a Baphomet ("really evil goat") instead. Either way, defeat the Ferres or Baphomet, and the room will reset until you guess the right one.
Room 8
Room 8 is a battle room. Defeat all the Ferres and Jitterbugs to advance. Compared to room 4, there are a lot more monsters that spawn with no breaks in-between the waves.
Room 9
Only 1 person need to complete the puzzle for the entire party. There are sign posts all over the room. Start with the first sign post closest to the entrance and follow the direction of the sign post literally. For example, if it tells you "LEFT" then head to the left of the sign post in a perfect straight line using the default camera location until you run into a new sign post. Repeat to talk to the sign posts in the given order until Ferre is satisfied and opens the portal to the next room for you. When the portal is opened, all the sign posts will disappear.
Room 10
The Ferre left another message...
"I had my friend who worked in a haunted house set us up with this one! They even upgraded the functions of the system!"
Looks like Boo had a ton of fun with this one...
This is an individual trial for all party members. Spinning blades fly through the room. The blades have an effective size of 3x3 squares. If they come into contact with your character, you'll be warped back to the start of Room 10. Time your movement and walk pass all the spinning blades to reach the end of the room. Flowers serve as walls to force you to walk amongst a particular path.
There are a few classes with skills that can help you bypass the blades. Champions can Snap pass the blades to the safe spots. Thief classes can back slide carefully to do the same thing to jump pass some of the targets. Since the flowers are targettable, Flying Side Kick potentially can unlock some paths by kicking to a spot near a flower. Ice Wall is dangerous but potentially rewarding: you can trap the blades using ice wall if you trap it in every direction with no gaps. However, if gaps are available, then the blades will break their usual pattern to try to reach their destination, making it unpredictable and possibly more difficult than before.
Movement speed gives a huge advantage here, even though the puzzle is doable with no movement speed buff. It opens up new opportunities that are not possible. For that reason, movement speed buffs and equipment are all very helpful. Nobility_Mount Nobility Mount is a huge advantage with Wind Walk/Increase Agi and it can give you a lot of breathing room to run past some of the blades when you normally cannot. Speed Potion can also help you rush through some areas, especiallly the triple diagonal spinning blades in the middle. Be careful not to use spells or AoE buffs that may stagger your teammate, such as wind walk, if they are in the middle of the run. The spell animation may stunlock your allies such that the blades catch up to them.
Patience is key, especially in the middle section with the 3 diagonal blades. You want to wait for a good opportunity. Since these 3 blades all move at different speed, they can either sync up or de-sync from each other and be rather unpredictable. It'll require your judgement of when is it possible or when are the blades giving you enough time to get pass them.
Room 11
Dancing is not my forte, but this looks fun!
This is a bullet hell room, but only 1 person from the party needs to pass it for the entire party. When you talk to Ferre in the middle, she'll be the center of a bullet hell game and fires bullets in all directions. You must try to dodge them all and survive the onslaught. If any bullet hits you, then you'll be sent to the end of room 10. No one can enter room 11 while the bullet hell session is ongoing. Like the previous room, movement speed can help, and same for Champion's Snap to get pass the bullets on to the safe spots. The bullets are fixed though and they always fire in the same way regardless of where players are standing, so your party can practice it until you understand where are all the safe spots for each wave of bullets and how to overcome all the bullet patterns unleashed by Ferre.
Room 12
What was that? The Ferre wanted to take a few Giant Steps?
What the- That's Huge! How loud can they be?!
This is another battle room, but with only Jitterbugs.
Room 13
Ooh! I know this one! We played this back in payon!
Awakened Ferre is the MVP here. It is a powerful MVP with lots of 3rd class spells that can do a lot of damage, with a deadly Severe Rainstorm to deal massive ranged damage. Land Protector can block a lot of the spells, but then you cannot Pneuma to block Severe Rainstorm. Use Pneuma instead to negate Severe Rainstorm and you'll have to eat the various spells casted on you. Although the MVP will never teleport, it'll force a character in range into a Frenzy state if it's ever rude attacked. Ankle Snares and Webs should be used sparringly or in a calculated method so that you don't have a party in Frenzy, or that you're purposely using the Frenzy to your advantage.
The MVP is also surrounded by pianos like in the quest. Throughout the battle, the MVP calls out a chord and you must attack the corresponding piano to "play" the chord. Look at the names of the piano to know which key you're playing. A piano that's playing will constantly spam the music note emote. When no chord or the wrong chord is being played, the pianos will all use Marsh of Abyss debuff on your party to lower your dex, agi, movement speed and cast speed. If you want, you can ignore the chords and accept Marsh of the Abyss as a constant debuff for everyone as part of the fight. If you play the chords correctly, Marsh of Abyss will stop and all the pianos will instead play various helpful Songs using base 200 stats, boosting your HP with a powerful Apple of Idun or a guaranteed 190 ASPD Assassin Cross of Sunset, and so on (note that Bragi is not one of the available songs from the pianos). Activating the chords can remove the debuff from your party and instead enjoy various benefits to make the fight easier.
At certain HP intervals, Awakened Ferre will enter an invincible state to initiate an add phase. Ferres and Jitterbugs are summoned randomly on to the field. The chords will shutdown if they have been activated. The MVP will spam Meteor Storm across the entire battlefield. Defeat all the summoned Ferres and Jitterbugs for the MVP to resume the fight. It's almost inevitable that the mobs will spawn on to the party, so all party members should be prepared to take some hits and the damage dealers need to dispatch the Ferres and Jitterbugs quickly, or use crowd control to disable them before they can wipe the party. Once all the summons are dispatched, Awakened Ferre will announce a new chord and the fight resumes. This will repeat 3 times depending on the MVP's HP. Should the MVP lose sufficient HP in a burst of damage (such as from Asura Strike) enough to trigger multiple phases, then you'll have to fight multiple add phases one after another with no breaks. Each phase has more summons than the last, with the last phase at 200,000 HP summoning 40 monsters into the room at once.
Defeating the MVP opens a warp portal that leads you back to the instance entrance. Be sure to walk through this portal instead of using a personal butterfly wing to qualify for Room 13 completion rewards.
Rewards
Talk to one of the Ferre at the entrance to pick up your reward after you've exited the instance.
For defeating Room 4, you may get 1 of the following:
- 25% to get 1 Pumpkin Candy Holder
- 25% to get 1 Small Elunium Box
- 25% to get 1 Small Oridecon Box
- 25% to get 5 Faeheim Reputation Points
For defeating Room 8, you may get 1 of the following:
- 30% to get 5 Faeheim Reputation Points
- 30% to get 1 Pumpkin Mojo
- 5% to get 1 Rhythmic Dancer's Ribbon
- 5% to get 1 Zeny's Duet
- 5% to get 1 Piercing Crescendo
- 5% to get 1 Mage's Elegy
- 5% to get 1 Flare Cadence
- 5% to get 1 Demon's Libretto
- 5% to get 1 Huuma Shining Aria
- 5% to get 1 Spirit's Harmonics
For defeating Room 12, you may get 1 of the following:
- 25% to get 5 Faeheim Reputation Points
- 30% to get 1 Past Halloween Gear Box
- 5% to get 1 Rhythmic Dancer's Ribbon
- 5% to get 1 Zeny's Duet
- 5% to get 1 Piercing Crescendo
- 5% to get 1 Mage's Elegy
- 5% to get 1 Flare Cadence
- 5% to get 1 Demon's Libretto
- 5% to get 1 Huuma Shining Aria
- 5% to get 1 Spirit's Harmonics
- 5% to get 1 Costume Diabolic Guitar
For defeating Room 13, you may get 1 of the following:
- 50% to get 5 Faeheim Reputation Points
- 20% to get 1 Past Halloween Gear Box
- 10% to get 1 Resting Swan (previously Art Contest exclusive)
- 10% to get 1 Minstrel Song Hat (previously Art Contest exclusive)
- 10% to get 1 Costume Diabolic Guitar
All rewards are cumulative and every party member earns their individual reward! Defeat the instance with a large party and everyone will be rewarded handsomely!
During heRO's belated Halloween celebration, you also get additional items. You may get 1 item out of either the common, uncommon or rare item pool. The chance to get an item from each pool varies depending on how far you have gone in the instance (minimum defeating Room 4.) The chance of common, uncommon and rare distribution are as follows:
- Defeating Room 4: 90%-9%-1%
- Defeating Room 8: 75%-23%-2%
- Defeating Room 12: 50%-47%-3%
- Defeating Room 13: 30%-63%-7%
The items in each pool are:
Common:
- 2 Old Green Box (20% chance)
- 10 Prize Medal (40% chance)
- 1 Bloody Branch (20% chance)
- 5 Old Purple Box (20% chance)
Uncommon:
- 1 Past Halloween Gear Box (25% chance)
- 10 Prize Medal (25% chance)
- 1 Pumpkin Mojo (25% chance)
- 1 Halloween Pet Box (25% chance)
Rare:
- 1 Costume Diabolic Rock Guitar (33% chance)
- 1 Gold Bullion (33% chance)
- 1 OCA (33% chance)
